Cleaning Beer Lines
 Cleaning beer lines on our 8-tap tower
Introduction
Beer lines should be cleaned regularly to get rid of hop resins, yeast residue, sugar build-up, bacteria, proteins, mold, beer stone (calcium oxalate) and other deposits that can accumulate over time. Many will create off-tastes in your beer including fake butter, light vinegar, or mustiness. Deposits can also create tiny nucleation sites that promote gushing and poor head retention. While nothing toxic can grow in beer, nobody wants to go to all the trouble of brewing the perfect pint only to have it tainted by dirty lines.
How often to clean depends on pour rate, beer composition, line length, and even line material (vinyl vs. barrier tubing). The more often you pour, the harder the water, the longer the line length, the softer the material, the more often the lines should be cleaned. The Draught Beer Quality Manual (free PDF download) published by the Brewers Association recommends the following schedule for commercial establishments using two different products that serve different purposes:
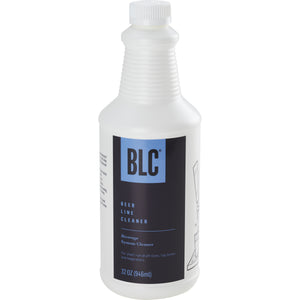
- Every 2 weeks: Use Beer Line Cleaner (BLC) / Liquid Line Cleaner (LLC) to remove hop resins, bio-films, yeast residue, sugar build-up, bacteria, proteins, carbohydrates, and mold. This is an alkaline (high pH) cleaning. In some locations the two-week timeframe is required by law.
- Every 3 months: Use Acid Line Cleaner (ALC) to remove inorganic materials such as calcium oxalate (beer stone) and calcium carbonate (water stone). This is an acid (low pH) cleaning. For best results always perform a BLC/LLC clean before an ALC clean, rising well with water between.
Due to the (usually!) much lower serving rate at home, most homebrewers should be able to go 6 weeks or more between using BLC/LLC and many will go longer without any issues. At home many will never use ALC either as regular use of BLC/LLC with ethylenediaminetetraacetic acid (EDTA) or other chelating agents will help remove beer / water stone. Harder water (including serving beers where the water has been hardened through water adjustments) will accelerate the buildup of stone as will using softer vinyl lines. We recommend and only use barrier tubing for our beer lines.
For our home use we aim to do a BLC/LLC cleaning every 3 months and an ALC cleaning every 12-18 months, but both often seem to slide a bit. 😉
Parts and tools
-
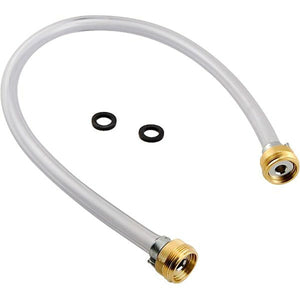
(Qty: 2 per jumper) Beer faucet cleaning adapter (3/8" barb) and(10" per jumper) Vinyl (PVC) tubing 5/16" ID and(Qty: 2 per jumper) Hose clamp (5/16" to 7/8" diameter hose)
- or - -
(2 x 5 feet) Vinyl (PVC) tubing 5/16" ID
-
(Qty: 1 for every 2 beer lines) Ball lock keg quick disconnect jumper post or equivalent
-
(Qty: 1) 1/4 HP utility pump
-
(Qty: 1+) 6 gallon plastic bucket
Purchasing through our affiliate links helps support our site at no extra cost to you. We thank you!
Process
We have eight taps in the basement bar so cleaning the lines individually would take an inordinate amount of time, so we link them all together in a giant loop and recirculate cleaner. This is exactly how the pros do it when cleaning lines in commercial restaurants and bars. The turbulent flow presented through re-circulating cleaner is up to eighty times more effective than simply allowing the cleaning solution to soak inside the beer lines (according to the producers of some line cleaners).
Beer line cleaners are very corrosive and dangerous if not used properly. Follow the directions printed on the packaging and wear gloves and eye protection. Never mix cleaners.
The general cleaning steps we follow to clean our eight taps are:
- Connect the beer lines on the quick disconnect keg side together using ball lock keg quick disconnect jumper posts (or equivalent) between lines 2-3, 4-5, 6-7, and 1-8.
- Remove the faucets on the serving side using a beer faucet wrench.
- Install the short beer line cleaning faucet jumpers on the serving side between taps 1-2, 3-4, and 5-6. Connect one of the 5' vinyl hoses with a beer faucet cleaning adapter (3/8" barb) as a return line to tap 7. Connect the second 5' vinyl hose with a beer faucet cleaning adapter to tap 8 and the other end to the 1/4 HP utility pump using the brass 3/8" hose barb to female garden hose swivel coupling. Everything is now connected in one giant loop.
- Fill the 6 gallon plastic bucket half way with water and drop in the pump. Leave the tap 7 return line in a sink or second bucket to allow it to drain.
- Turn on the pump by plugging it in. The beer is now flushed from the lines by the pump using the water in the bucket. Removing all the beer from the lines first means the beer line cleaner will have less work to do.
- Once the lines only have water in them, turn off the pump and fill the pump bucket with water and cleaner. Follow the manufacturer instructions for the proper mix ratio and temperature. It usually only takes an ounce or two of cleaner per gallon of water as it's really strong stuff. Don't forget to also account for the water in the lines when calculating the mix ratio. Our 0.25" ID beer line holds 0.33 ounces per foot, so with almost 140 feet of line across 8 taps, we have 0.36 gallons in the lines.
- If you're using a line chilling system such as a glycol chiller, turn it off. Cleaning is usually done at warmer temperatures and we do not want the chiller to cool the cleaning solution.
- Place the tap 7 return line in the pump bucket, turn the pump back on, and allow the water with cleaner to recirculate per the manufacturers recommended minimum contact time. Most will recommend 15-20 minutes at a rate of 2 GPM. If your flow rate is lower than the recommended rate, recirculate longer. This is especially true if you've been delinquent with your line cleaning.
- While the cleaner is recirculating, enjoy a beer while you disassemble, soak, and then scrub clean the faucets that were previously removed with an oxygen based cleaner. For a deep clean allow the faucet parts to first soak in the pump bucket with line cleaner. Rinse and re-assemble.
- After recirculating, remove the tap 7 return line from the pump bucket and place it back in the sink or second bucket to allow the cleaner to drain from the lines. As the pump bucket empties fill it once or twice more with water to flush all of the cleaner from the lines. The lines are now cleaned and full of water.
- Remove the jumpers on both the keg and serving sides. Re-install the faucets using the beer faucet wrench. Once installed, make sure to push the faucets all the way back to close them.
- Reconnect the quick disconnects to the kegs. Don't reverse this step with the last unless you like beer all over the floor. 😉
- Drain the water from the lines by pouring from each line until beer starts to flow again.
- Sample and enjoy!
Check out the videos below to see these steps in action.
Questions? Visit our Cleaning beer lines forum thread.
Happy cleaning!
Hints
- If you have more or less lines then you'll need to adjust the number of jumpers on both sides. For example, when cleaning our 2-tap kegerator we only need to use one jumper on the keg side to join the two lines together, and no jumpers on the serving side. An odd number of taps will require the drain and source lines to come from opposite ends (serving vs keg) with modifications to the adapter(s) used on the keg side.
- Don't try to remove faucets with anything other than a beer faucet wrench. You'll only end up scratching / mangling things if you try to use vice grips (for example). A faucet wrench is specially made for removing / attaching faucets.
- In the market for a tap tower? Stay away from the really cheap towers. Some of the junkier stuff is made from softer metal and won't hold up over the years to constant faucet removing / attaching. We recommend and use a commercial grade tower and draft lines in both our basement bar and on our kegerator. It's the same quality you'll find in bars around the world and will last you a lifetime. (More information)
Useful links
Pictures / Videos
Interested in seeing what we're brewing right now? Follow us on Instagram for pictures and videos of our brewing activities as they happen.


