Brew Day Step by Step
- Introduction
- Parts and tools
- STEP 1: Mill grain
- STEP 2: Fill Hot Liquor Tank with water
- STEP 3: Heat strike water
- STEP 4: Transfer strike water to Mash / Lauter Tun
- STEP 5: Mash
- STEP 6: Mashout
- STEP 7: Sparge
- STEP 8: Boil
- STEP 9: Chill
- STEP 10: Clean
- STEP 11: Ferment and package
- Pictures / Videos
Introduction

The best way to learn how to use The Electric Brewery is to walk through a typical brew day, so let's brew something!
We'll make a simple 5.1% ABV Blonde Ale, enough to fill two 5-gallon Corny kegs. This beer is one of our house favourites. It's a big hit with everyone who tries it as there's enough malt and hop flavour to keep the beer snobs happy (we don't use any corn or rice), but it's still light enough to not scare away the Bud / Miller / Coors drinkers. It's a beer that just about anyone who likes beer can enjoy.
It's a very simple recipe with one type of malt and one type of hop. Far too many brewers tend to overcomplicate recipes thinking that if their beer's not perfect they're missing an ingredient. Not true. Usually simpler is better. The trick is choosing good quality fresh ingredients such as the German Weyermann Pilsner Malt and Hallertau Mittelfruh noble hops used here, and then using excellent process with equipment that can correctly implement that process.
Here is the relevant brew day information from our Blonde Ale recipe:
Blonde Ale
Size: 12 US gallons (post-boil @ 68F)
Mash Efficiency: 95% (how well our system converts grain starches to sugars - higher means less grain is required)
Attenuation: 80% (percentage of sugar converted to alcohol by our yeast)
Original Gravity: 1.048 (sugar before fermentation)
Final Gravity: 1.010 (sugar after fermentation)
Colour: 3.1 SRM (very light)
Alcohol: 5.1% ABV (average strength)
Bitterness: 19 IBU (not very bitter)Mash:
18 lb German Pilsner Malt (1.5-2.1L) (100%)Boil:
2.7 oz German Hallertau Mittelfruh Hops (4.5%) - added during boil, boiled 60 min [19 IBU]
1 Whirlfloc Tablet (Irish moss) - added during boil, boiled 15 minNotes / Process
- Add 500mg potassium metabisulfite to 20 gallons water to remove chlorine / chloramine (if required).
- Water treated with brewing salts to our Balanced flavour profile: Ca=50, Mg=10, Na=16, Cl=70, SO4=70. (Hit minimums on Ca and Mg, keep the Cl:SO4 ratio low and equal. Do not favour flavour / maltiness or bitterness / dryness. For balanced beers.). For more information on how to adjust your water, refer to our step by step Water Adjustment guide.
- 1.5 qt/lb mash thickness.
- Single infusion mash at 149F for 120-180 mins. (A very long low temperature mash helps dry out the beer).
- Raise to 168F mashout temperature and hold for 10 mins.
- ~90 min fly sparge with ~5.6-5.8 pH water (measured at mash temperature). Collect 14.9 gallons.
- Boil for 90 minutes, adding Whirlfloc and hops per schedule. Lid on at flameout, start chilling immediately.
- Cool the wort quickly to 68F (we use a one-pass convoluted counterflow chiller to quickly lock in hop flavour and aroma) and transfer to fermenter.
Purchasing through our affiliate links helps support our site at no extra cost to you. We thank you!
Don't be concerned if some of the above is confusing at this time. We will be explaining each item as we proceed through the steps.
Want to brew something different instead? See our recipes.
So why are we making 12 gallons of wort if we only want 10 gallons of beer? This is to compensate for the normal losses that occur throughout the brewing process on any brewing setup. Some of the wort will get left behind in pumps and hoses, some in the Boil Kettle with the hops and hot break material, and some will be lost to cold break after chilling and to sediment in later fermentation stages. Losses have also been known to occur due to excessive sampling at kegging time. 😉
Different beers will have different levels of loss: The hoppier the beer, the more you'll tend to lose as hops soak up wort. Our beer here with less than 3 oz of hops will not lose much. Make an aggressively-hopped IPA like Pliny the Elder or Electric Hop Candy (some of our favourites), and you could easily lose half a gallon per 10 gallons simply to hop absorption. Many hoppy beers are also dry hopped (hops are added after fermentation is complete) which also soaks up additional beer.

Most recipes you'll find online and in books always talk about making 5 gallons of wort which can result in as little as 4 gallons getting into the keg at the end of the process. Who wants a keg that starts off only 80% full? One book that does get this right is our favourite recipe book: Brewing Classic Styles. Their recipes start with 7 gallons pre-boil which typically results in 6 gallons post boil, 5.5 gallons getting into the fermenter, and a final 5 gallons going into the bottles or keg.
Making approximately 10-20% more wort ensures that we'll be able to completely fill those two 5-gallon Corny kegs at the end of the process. While it's not hard to scale recipes up or down based on volume size (modifications must be done anyways as different systems and processes all have different efficiencies), it still surprises us that most recipes always talk about producing 5 gallons of wort instead of 5 gallons of beer.
The easiest way to modify or create a recipe is to use brewing software. After brewing you enter the measured original gravity and amount of grain used and the software will then tell you the mash (conversion) efficiency you achieved. This can then be used for subsequent brews so that you know exactly what to expect. If you've built a setup like ours using the exact same parts you can assume an 85-95% mash efficiency to start (we recommend assuming a value at the lower end of this scale for your first brews). Tweak from there as you brew more often and get a feel for your setup. The higher the mash efficiency, the better the system is at converting grain starches to sugars, which means less grain is required. For more information on mash efficiency, see our FAQ.
Most brewing software will include ingredients databases (grain, hops, yeast, etc.) and will keep track of the ingredients you have on hand (inventory management). When we create a recipe we simply drag and drop items into place and enter the amounts. The software then continuously calculates the estimated beer gravity, colour, alcohol, and bitterness levels. The software also allows you to select a beer 'style' (usually per the BJCP style guidelines) so that you can quickly assess where your recipe falls within these guidelines.
We've used various brewing software over the years. The one we use now is BeerTools Pro. It's a one time purchase that you install on your PC/laptop. Those looking for an online cloud based solution may prefer Brewfather that offers a subscription model with monthly or yearly payments. It's important to remember that all brewing software will make excellent beer when used correctly. They all work. Don't be mislead into thinking that one type of software will somehow let you brew better beer as that simply isn't true. We recommend trying a few and using the one that has the features and payment model that works best for you.
 Our Blonde Ale recipe entered into BeerTools Pro
Brewing software will often include fields where specifications about your brewing equipment can be entered. We recommend that these not be used. This guided step by step will provide you with everything you need to brew from start to end such that you see an understand where the numbers come from.
Some notes on sampling: A good chef always samples when preparing a meal, from the fresh ingredients to the finished product. This helps them access the quality of the ingredients and to monitor and understand how the food is changing throughout the cooking process. Making beer is no different. You should be tasting and smelling throughout the process. Take a few raw grains and chew on them when you create recipes. What do they taste like? Bread? Caramel? Burnt? Rub some hops between your palms (don't taste them!). How do they smell? Floral? Fruity? Earthy? Taste the wort during the various steps while you brew. Is it starchy? Sweet? Astringent? Taste the beer during the various stages of fermentation and aging. Note how it changes over time. Our senses are an important tool that should be used when brewing beer. Don't only rely on the numbers provided by your brewing equipment or software. Numbers only tell part of the story.

 Weyermann Pilsner Malt ready to be turned into beer
Keep in mind that everyone approaches brewing slightly differently. There are many 'right' ways to make beer. The instructions that follow are how we use our Electric Brewery. Use these as a starting point and tailor as needed. The system is flexible enough to meet the needs of just about every brewer, from beginner to seasoned professional.
We will be using many additional parts and tools during our brew day. For a complete list, including why we chose them and where to get them, refer to our Using Your Brewery guides and tools.
If you wish to have 100% control of your beer you'll want to adjust your water as well. For more information refer to our Water Adjustment guide.
Before using your Electric Brewery Control Panel for the first time ensure that you've completed the Control Panel (Setup) procedure which includes calibrating your temperature probes.

Parts and tools
-
BeerTools Pro (or other brewing software)


Purchasing through our affiliate links helps support our site at no extra cost to you. We thank you!
STEP 1: Mill grain

The 18 pounds of grain must be crushed or 'milled' to expose the starches inside. This makes it easier for the water to extract sugars and other desirables.
Place the 5 quart stainless steel mixing bowl on the digital kitchen scale and tare (zero) the scale before adding grain. We typically measure out grain in 4-5 lb increments and dump it directly into the hopper on the grain mill that sits on top of a 7.9 gallon plastic food grade bucket.
With a recirculating system such as ours a coarser crush is recommended, so make sure the rollers in your mill are set approximately 0.045" apart as recommended in our Grain Mill guide. A fine crush is not required and may actually lower your mash efficiency as it impedes fluid flow. Our Electric Brewery achieves a very high 95% mash efficiency even with this 0.045" gap setting. We feel this helps avoid issues such as stuck sparges which can be problematic with some beer styles. Most home brew stores mill fairly tight as they are catering to brewers that do not have recirculating setups.
Mill at around 150-250 RPM (around 2-4 turns/second) using a 1/2" hand drill (we use a Milwaukee M18 at the low speed setting). At this low RPM, shredding of the grain husks is mostly avoided which will help reduce the possibilities of extracting excess tannins. While all beer will have some, with most beers (including this one) we want to try and minimize tannins. Tannins have a tongue-drying astringent taste like over steeped tea or strong red wine.
It should take approximately 2-3 minutes to mill the 18 pounds of grain. A hand crank can be used too but takes considerably longer.
 Weighing out grain on brew day
 A mix of light and dark grain ready to be milled. This grain bill is for a batch of Firestone Walker Wookey Jack Black IPA.
 A perfect crush results in most of the husks remaining intact while the grain inside is cracked into approximately 2-4 pieces
STEP 2: Fill Hot Liquor Tank with water
You'll need about twice as much water as the finished beer you wish to produce. Since we want to produce 10 gallons of beer we fill the Hot Liquor Tank with 20 gallons of water.
Before disconnecting or connecting any hoses, it's a good practice to always CLOSE all of the ball valves in the entire setup. Do this now. When closed, the handle will be perpendicular to the flow of liquid through the valve.
Use the water hose adapter (optional) to connect one of the hoses between the water supply and the Hot Liquor Tank IN valve as shown in the picture below.
 STEP 2: Fill the Hot Liquor Tank with cold water
The video below shows the quick disconnects in use:
OPEN the Hot Liquor Tank IN valve and then turn ON the water source. Fill the Hot Liquor Tank to the 20 gallon mark. Turn OFF the water supply. CLOSE the Hot Liquor Tank IN ball valve. The Hot Liquor Tank is now full of cold water.
 Hot Liquor Tank filled to the top with 20 gallons of cold tap water
Add 500mg potassium metabisulfite to the 20 gallons of water to remove chlorine / chloramine. Most cities use one or the other to treat the water. There's no harm in adding one tablet even if you're unsure if your city uses chlorine / chloramine. If left in, chlorine or chloramine can give beer a band-aid or plastic taste. The chemical reaction is nearly instantaneous and there's no need to stir.
If your city water is soft (low in minerals / salts) and tastes fine then using cold tap water is perfectly adequate. We use our city's water as it is very soft (low in minerals) which means it's great for brewing as you can always increase minerals by adding salts but cannot easily take them away (distillation or reverse osmosis must usually be performed). For more information on what water to use refer to our Water Adjustment guide.
STEP 3: Heat strike water
We need to heat the water so that we can mash (soak) the grain to release the sugars. This heated water is called 'strike' water.
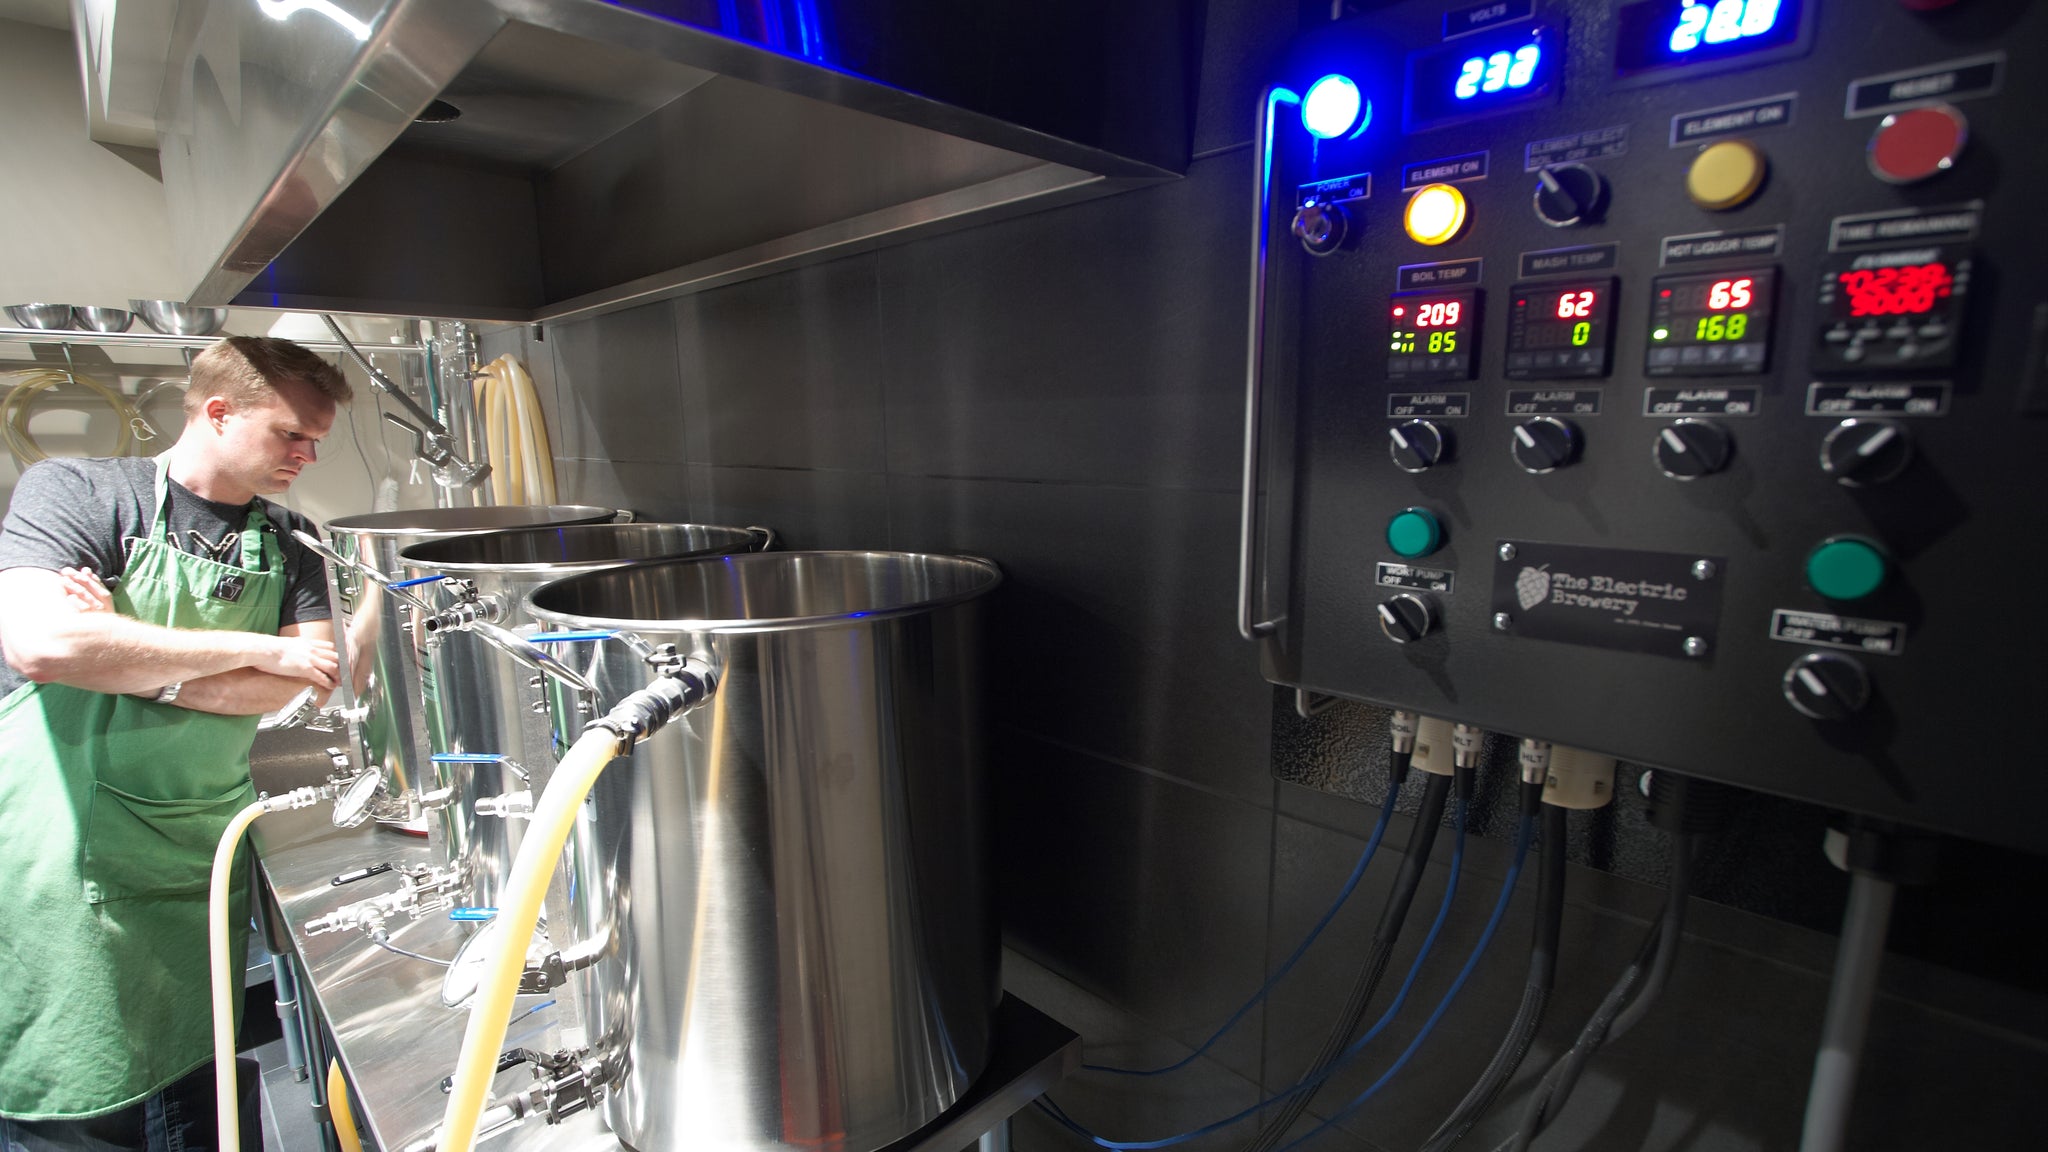
Ensure all control panel cables are properly connected and locked in place and then turn the POWER switch ON. If the control panel does not turn on, make sure that the WORT PUMP, WATER PUMP, and ELEMENT SELECT switches are all OFF. (For added safety the safe start interlock feature will not allow the control panel to turn on if any of these switches are in the ON position).
Connect two of the shorter hoses as shown in the picture below.
 STEP 3: Heat the strike water
OPEN the Water Pump valve first, then the Hot Liquor Tank IN valve, and finally the Hot Liquor Tank OUT valve (this order helps ensure the pump head is fully primed). You should hear water gurgling down to the Water Pump and air bubbling out the Hot Liquor tank IN tube inside the kettle.
Turn the WATER PUMP switch ON to continuously recirculate water through the Hot Liquor tank. If you are using our recommended pump and have placed it well below the Hot Liquor Tank you should not experience any pump priming issues. The pump will push any remaining air out of the hoses.
Press the UP / DOWN buttons on the Hot Liquor Tank PID until the lower green number reads 149F. This is the mash temperature for our recipe. We are mashing at a fairly low temperature in order to produce a wort that is more fermentable which will leave us with a dryer and lighter tasting beer. Mashing at higher temperatures results in less starch to sugar conversion leaving a beer with a fuller body and flavour.
 Setting the HLT temperature to the 149F mash temperature
Turn the ELEMENT SELECT switch to HLT. The Hot Liquor Tank element will now fire as required to heat the water to 149F and maintain that temperature. It takes approximately 40-60 minutes to heat 20 gallons of cold water to mash temperature with our 5500W heating element. Keep the lid on the Hot Liquor Tank during this period to minimize heat loss. If brewing indoors you may want to run your hood fan at low speed to exhaust any excess heat.
OPTIONAL ALARM: You may set the Hot Liquor Tank alarm to sound to let you know once 149F is reached. Press and hold the SET button on the Hot Liquor Tank PID until ALM1 is displayed. Press the UP / DOWN buttons until 149 is displayed. To exit the setup menu, wait 10 seconds. Turn the Hot Liquor Tank ALARM switch ON. When the Hot Liquor Tank water temperature reaches 149F the alarm will sound. Turn the Hot Liquor Tank ALARM switch OFF to turn off the alarm.
STEP 4: Transfer strike water to Mash / Lauter Tun
We need to figure out how much strike water to transfer to the Mash / Lauter Tun in order to soak (mash) our grain.
Like mash temperature, the water to grain ratio (often called 'liquor to grist ratio') used when mashing also affects the beer you produce (to a much lesser degree however). A thicker mash (less water) produces a beer that is fuller / sweeter as it creates more unfermentable sugars while a thinner mash (more water) produces a thinner / dryer beer as it creates more fermentable sugars.
This mash thickness is usually expressed as the number of quarts of water per pound of grain. A mash thickness of about 1.25 quarts per pound is a common ratio used for most ales. For beers such as this one that we want to be a bit thinner / dryer, 1.5 to 2.0 quarts per pound is common.
For our Blonde Ale we will be using 1.5 quarts per pound mash thickness so the amount of strike water required is:
Strike water = (Mash Thickness * Pounds of Grain / 4) + dead space under false bottom + liquid in hoses = (1.5 * 18 / 4) + 0.22 + 0.5 = 7.5 gallons
Our 20 gallon Blichmann kettle holds 0.22 gallons under the false bottom and there is approximately 0.5 gallons of liquid in our hoses and the 50 foot HERMS coil, so we account for these in our equation.
Turn the ELEMENT SELECT switch OFF. Turn the WATER PUMP switch OFF. CLOSE all valves. Move the hose from the Hot Liquor Tank IN valve to the Mash / Lauter Tun IN valve as shown in the picture below.
 STEP 4: Transfer the strike water to the Mash / Lauter Tun
OPEN the Mash / Lauter Tun IN valve first, then the Water Pump valve, and finally the Hot Liquor Tank OUT valve (this order helps ensure the pump head is fully primed). Turn the WATER PUMP switch ON. Transfer ~7.5 gallons to the Mash / Lauter Tun. CLOSE the Water Pump valve. Turn the WATER PUMP switch OFF. Keep the Mash / Lauter Tun and Hot Liquor tank lids on throughout the process to minimize heat loss. If brewing indoors you may want to run your hood fan at low speed to exhaust any excess heat.
 The Hot Liquor Tank water level is lower after transferring the strike water to the Mash / Lauter Tun
STEP 5: Mash
The strike water we transferred over to the Mash / Lauter Tun will have lost some heat as the kettle was cold. Before mashing in (adding the grain), we should let the water recirculate through the HERMS coil for 5-10 minutes to get back up to the mash temperature.
CLOSE all valves. Connect hoses as shown in the picture below.
 STEP 5: Mash

OPEN all Mash / Lauter Tun valves, Hot Liquor Tank valves, and both pump valves. (Opening the Mash / Lauter Tun OUT valve last can help if you have pump priming issues). Turn the WATER PUMP and WORT PUMP switches ON. Turn the ELEMENT SELECT switch to HLT. The water in the Mash / Lauter Tun will recirculate in the HERMS coil and the temperature will return to our 149F mash temperature. Keep the Mash / Lauter Tun and Hot Liquor tank lids on throughout the process to minimize heat loss. If brewing indoors you may want to run your hood fan at low speed to exhaust any excess heat.
Once both the Hot Liquor Tank and Mash / Lauter Tun PIDs read 149F (our mash temperature), it's time to add the 18 pounds of grain.
Turn the WORT PUMP switch OFF to stop recirculation through the Mash / Lauter Tun. Leave the WATER PUMP running in order to maintain the water in the Hot Liquor Tank at 149F mash temperature.
Remove the Mash / Lauter Tun lid and position the hose out of the way temporarily as shown in the picture below.

Gently scoop the milled grain into the Mash / Lauter Tun. A small bowl works well. If using mash salts add them at this time as well.
 Grain added to Mash / Lauter Tun
Stir for a few minutes with the mash paddle to ensure that all of the grain is wet and there are no dough balls (dry pockets of grain). Dough balls form when the starch around grain gelatinizes and provides a barrier from the water. If they are not broken up early, they can later release unconverted starches into the mash. Dough balls happen most often when mashing in at or above the gelatinization temperature of barley starch (140F and above).
Stirring should be done gently without any splashing to minimize oxygen uptake (hot side aeration) which some say may lead to off-flavours (though this is a highly debated topic).
 Gently stirring the grain with the mash paddle
Once well mixed and left for at least 10 minutes, take a pH reading by placing the probe tip of the pH meter directly in the mash. While the pH meter we use has automatic temperature compensation (ATC) up to 140F (slightly below our mash temperature), we do not worry about cooling down a sample as the errors introduced will be usually be minimal if our mash is slightly higher than the maximum ATC temperature. The pH meter probe electrode will last longer if the sample is first cooled to room temperature, but ours (so far) has last 10 years when brewing once or twice a month, so we've never bothered cooling down a sample as it's much quicker. Feel free to cool a sample to room temperature if you prefer, or if your pH meter's maximum temperature compensation is considerably lower than the temperature you're measuring at.

pH is affected by the grain we use (darker grains lower pH more than lighter ones), any brewing salts we add (some salts increase pH, some reduce pH), and by temperature.
For optimal starch to sugar conversion we want the pH to be around 5.2 to 5.4, but only when measured in the mash temperature range of somewhere around 145-165F. pH changes with temperature, so if the sample has been cooled to room temperature, a pH of 5.4 to 5.6 is the target range instead of 5.2 to 5.4. Don't confuse the inclusion of automatic temperature compensation (ATC) in the pH meter to mean that the target range will always be 5.2 to 5.4 regardless of temperature, as that would be incorrect. ATC only compensates for the change in the electrical response of the pH meter probe with temperature. It does not compensate for the chemical / energy change in the water that naturally makes a hotter mash more acidic (lower pH). The pH target range will therefore always depend on the temperature of the sample: 5.2 to 5.4 when measured at mash temperature, or 5.4 to 5.6 when measured at room temperature. For more information see our Measuring pH guide.
Regardless of range, there is no 'one' correct mash pH as the various enzymes work best at different pH levels when converting the grain starches to sugars. While a wide range (from 4.5 to 5.6) is acceptable for mashing, most brewers will try and stay somewhere in the 5.2 to 5.4 range (when measured at mash temperature). A higher pH (more basic) produces a sweeter beer due to a less fermentable wort and more body. A lower pH (more acidic) produces a drier beer with thinner body due to a more fermentable wort. A lower pH also ensures better extraction efficiency, better hot break formation, lighter colour, and is less prone to form haze.
The most common problem brewers face with a light coloured beer such as our Blonde Ale is that the mash pH will be too high. If your pH is above the 5.2 to 5.4 range (when measured at mash temperature), add some 88% lactic acid half a milliliter (mL) at a time using a 1mL (1 cc) syringe, stir well with the mash paddle and wait for at least 5-10 minutes, and re-measure until you get close to 5.2 (when measured at mash temperature). It usually only takes one or two milliliters at most for a mash this size. At these low amounts (0.1-0.2 mL per gallon), lactic acid will not affect the taste of even the lightest of beers.
 Mash pH at 5.21 after adding mash salts and a bit of 88% lactic acid. Perfect!
Place the hose back in the kettle on top of the grain bed as shown in the picture below. The hose may sink in a bit or be mostly submerged. This is normal. Place the lid back on the Mash / Lauter Tun.

Both of the Mash / Lauter Tun valves and the WORT PUMP valve should still be completely open. Turn the WORT PUMP switch ON to start recirculating the mash liquid through the HERMS coil.
We want to count down our 90 minute mash:
- If your control panel uses the newer JSL-74A timer: Press the STP button, followed by the SET button, then use the UP/DOWN buttons until the lower number reads "90:00". Press the SET button to exit (or wait).
- If your control panel uses the original Eagle B506-5001/Omega PTC-21 timer: Press the 4/3/2/1 buttons until the lower number reads "90:00".
Press the RESET button to start the timer. The top number on the timer will count down from 90:00 to zero to let us know how the mash is proceeding.
OPTIONAL ALARM: To be notified when the 90 minute mash is finished, turn the timer ALARM switch ON. Once the alarm sounds turn the timer alarm switch OFF or press the RESET button.
Do not stir by hand or use any mechanical stirring devices from this point forward as this is counter productive and destroys this natural grain filter. After the grain is initially mixed with the strike water, it should never be disturbed again.
The initial mash temperature will be a few degrees below our target as the grain was cold. After a few minutes of recirculation the mash temperature will have risen back up to 149F. Having the mash a few degrees below the target mash temperature for a few minutes will not have a noticeable effect on the starch to sugar conversion.
 Mash temperature is maintained as the liquid is recirculated through the HERMS coil in the Hot Liquor Tank. Both vessels stabilize at exactly at 149F.
Some users may choose to set their Hot Liquor Tank a few degrees higher (such as 154F) when heating their strike water, and then lower the temperature to 149F after mashing in. This would reduce the ramp-up time but we don't bother as it does not have any adverse effects. The beer is not dryer than we expect (a lower mash temperature produces more fermentables which results in a dryer beer). On brewing setups that do not use our recommended parts, the mash temperature may never quite reach the Hot Liquor Tank temperature due to slower flow and heat loss in the Mash / Lauter Tun, hoses, and pumps. To compensate you may set the Hot Liquor Tank temperature a degree or two higher.
While most of the starch to sugar conversion will take place in the first 30-60 minutes, we will mash for 90 minutes to maximize conversion as the mash temperature is low (conversion takes longer at lower temperatures). Some very high gravity beers (such as a strong barleywine) can even benefit from a longer mash. Mashing longer increases the attenuation of the beer, resulting in a lower final gravity or dryer beer. Some brewers like to perform an iodine test to know when their mash is done (all starches have been converted to sugars) but unfortunately this test is far from conclusive as it only tests for starches and large dextrins (sugars). Short-chain fermentable sugars may not exist yet in the quantities you want, meaning you may hit your target starting gravity but your post-fermentation final gravity may be higher than you like. With more time these will also become fermentable. We recommend skipping the iodine test.
The mash in this example is called a 'single-infusion' mash as a single temperature (149F) is used throughout the 90 minute mash period. It is the simplest and by far the most common method used by home brewers and craft brewers as today's modern malts are already well modified. A well-modified malt has already undergone a lot of process steps that involve different temperatures before it arrives in your hands. The home brewer only needs to mash at a single temperature for efficient starch to sugar conversion. Historically, when under-modified malts were more common, some of these steps had to be done by the brewer by mashing at multiple temperatures (called 'step' mashing). For more information on these and other mashing techniques, see Chapter 16 of How To Brew and Chapter 2 of Brewing Better Beer.
Even with today's highly modified malts there may be times when we want to step mash, such as when maximum fermentability is desired for a very dry beer, or when certain flavours are to be enhanced. See our recipes for examples. Step mashing is easy with our Electric Brewery setup. Simply start at the first temperature and increase as required by using the UP button on the Hot Liquor Tank PID after each rest. The mash temperature will ramp up at a rate of approximately 2 degrees per minute.
The continuous recirculation filters the wort naturally using the husks in the grain bed (a process called 'vorlauf'). The wort slowly clears over time as the grain is mashed.
 Clear wort at the end of mashing
The video below shows the mashing step in action:
STEP 6: Mashout
After our 90 minute mash we increase the mash temperature to 168F and hold for 5-10 minutes to further dissolve the wort sugars. This is called the 'mashout' and helps make the grain bed and wort more fluid for the next step (sparging). This is most beneficial on setups with smaller mash filters / false bottoms than our design as it helps in getting the wort flowing more easily, avoiding stuck sparges. We've experimented by skipping the mashout step on our Electric Brewery setup and have not experienced any difficulties with sparging, even with sticky mashes composed of 70% wheat malt.
At the 168F mashout temperature all enzyme action is also stopped, effectively preserving or 'locking in' our beer's sugar profile so that no further changes can be made.
Press the UP button on the Hot Liquor Tank PID until the lower green number reads 168F. The Hot Liquor Tank will rise to 168F and the mash will follow. It takes approximately 20 minutes for a mash this size to reach mashout temperature. There is no need to move any hoses or adjust any valves. Keep the Mash / Lauter Tun and Hot Liquor tank lids on throughout the process to minimize heat loss. If brewing indoors you may want to run your hood fan at low speed to exhaust any excess heat.
OPTIONAL ALARM: You may set the Mash / Lauter Tun alarm to sound once the 168F mashout temperature is reached. Press and hold the SET button on the Mash / Lauter Tun PID until ALM1 is displayed. Press the UP / DOWN buttons until 168 is displayed. To exit the setup menu, wait 10 seconds. Turn the Mash / Lauter Tun ALARM switch ON. When the mash temperature reaches 168F the alarm will sound. Turn the Mash / Lauter Tun ALARM switch OFF to turn off the alarm.
 The Hot Liquor Tank temperature is set to (and has reached) 168F. The mash temperature (currently at 164F) is following close behind.
Mashout is a good time to acidify the sparge water (if required). To avoid excess tannin extraction from the grain husks, we want the sparge water pH to be below 6.0 (when measured at mash temperature), preferably in the 5.6 to 5.8 range. Take a pH reading by placing the probe tip of the pH meter in the Hot Liquor Tank. If the water is well above the maximum ATC temperature of your pH meter you may want to extract a sample and wait for it to cool slightly first. To lower the pH, add some 88% lactic acid half a milliliter (mL) at a time, wait a few minutes for the acid to recirculate and mix, and re-measure. It usually only takes us one or two milliliters at most in 10-13 gallons to get down into the 5.6 to 5.8 range. All water is different however. Once you know how your water reacts, you'll be able to adjust it without having to measure the pH every time.
The video below shows mashout in action:
STEP 7: Sparge
Once the grain has reached the 168F mashout temperature it's time to sparge.
Sparging is the action of rinsing the sugars from the grain. The resultant liquid is called 'sweet wort'. (It technically does not become wort until it is boiled with hops or other bittering ingredients to offset the sweetness).
For best flavour and long term stability we like to boil hard which results in a reasonably high boil off rate of 1.9 gallons per hour. Since we want end up with 12 gallons after the 1.5 hour boil used by this recipe, we must collect 12 + (1.5 * 1.9) = 14.9 gallons of wort in the Boil Kettle. (A 60 minute boil would require us collecting 13.9 gallons, a 120 minute boil 15.8 gallons).
The amount of sparge water needed can be calculated as follows:
Liquid lost to grain absorption = Pounds of grain * 12% = 18 * 0.12 = 2.2 gallons
Sparge water = Pre-boil kettle volume + Liquid lost to grain absorption - Strike water = 14.9 + 2.2 - 7.5 = 9.6 gallons
The amount of sparge water is not something we normally need to calculate however when sparging continuously as we do (called 'fly sparging'). We always fill the Hot Liquor Tank with twice as much water as finished beer we wish to produce and then simply sparge until the Boil Kettle reaches our pre-boil volume (14.9 gallons in this case). Simple!
Turn the ELEMENT SELECT switch OFF. Turn the WATER PUMP and WORT PUMP switches OFF. CLOSE all valves. Connect hoses as shown in the picture below. We recommend heat resistant gloves be worn.
 STEP 7: Sparge

The sparge water is passed through the HERMS coil before being deposited on top of the grain in the Mash / Lauter Tun. This is done for two reasons: To make sure we get the close to 1/2 gallon of concentrated wort out of the HERMS coil and to clean the inside of the coil. After we've done sparging, there's no need to clean the HERMS coil as it has been thoroughly rinsed with hot water.
The longer 6 foot hose directing wort into the Boil Kettle is simply placed over the side so that we can see the flow rate and to make it easier to take samples for pH and gravity measurements. (The hose end is purposely heavy, there is no danger of the hose falling out of the kettle). OPEN all Mash / Lauter Tun and Hot Liquor Tank valves. Turn the WATER PUMP and WORT PUMP switches ON. Slowly OPEN the Wort Pump valve to produce a slow trickle of wort into the Boil Kettle (a slow rate helps maximize sugar extraction). OPEN the Water Pump valve the same amount to match the rate and provide a source of sparge water to the top of the grain bed. Try and keep a minimum of 1-2 inches of water on top of the grain bed until the Hot Liquor Tank is empty. Turn the WATER PUMP switch OFF once the Hot Liquor Tank is empty. Continue to collect wort in the Boil Kettle until a volume of 14.9 gallons is reached. The entire fly sparge process should take 60-90 minutes (regardless of batch size). Discard any additional wort.
During the sparge keep the Mash / Lauter Tun and Hot Liquor Tank lids on to minimize heat loss. The Boil Kettle lid may be left either on or off. If brewing indoors you may want to run your hood fan at low speed to exhaust any excess heat and moisture.
 Both pumps are kept mostly closed during the 60-90 minute sparge to maximize sugar extraction
 Try and keep at least an inch or two of water on top of grain bed during sparing, though more is fine. The extra weight will not cause stuck sparge issues with the efficient Blichmann false bottom.
 Wort collecting in the Boil Kettle. After a long recirculation the wort is very clear which helps reduce astringency.
A handy trick to match pump rates: Use a black binder clip as shown below to mark the water level and watch it for the first few minutes of sparging. If the water level moves up or down over these few minutes, adjust the Water Pump valve slightly to compensate. It takes us about 5 minutes to match rates at the beginning of the sparge. By not using an automatically regulated sparging system (such as the Blichmann 'Auto Sparge') there is no chance of clogs and less parts to clean.
 The level gauge visibly shows how the wort level is dropping in Mash / Lauter Tun during sparging
 The WATER PUMP switch is turned OFF once the Hot Liquor Tank is emptied
The sparge water starts at 168F and slowly cools throughout the 60-90 minute sparging process since we turned off the Hot Liquor Tank element. By the end of the sparge the mash will be about 20 degrees cooler. This is intentional. A lower temperature near the end of the sparge helps minimize tannin extraction from the grain husks when it is most likely to occur (the mash has less sugar and higher pH). By the end of sparging the mash has very little sugar left so the drop in heat does not affect the flow.
 pH and gravity readings may be taken near the end of the sparge. The pH should remain below 6 (when measured at mash temperature) and gravity above 1.008 to avoid excess tannin extraction, though this is seldom an issue given that we've allowed the sparge water temperature to drop naturally during the 60-90 minute sparge.
Previously we mentioned the importance of sampling the wort at various brewing steps. Sparging is a great time to do this to better understand how the wort changes from being initially thick and sugary to being mostly water with a slightly grainy / tannic taste near the end.
 The Boil Kettle is almost at the 14.9 pre-boil volume
 Any additional wort is sent down the drain once the pre-boil volume is reached (at this point the wort is mostly water anyway)
 Spent grain in the Mash / Lauter Tun
The video below shows sparging in action:
STEP 8: Boil
The Boil Kettle should now be full up to the 14.9 gallon mark.
If desired, stir well and take a sample to measure the wort pH using the pH meter. It should be around 5.0 to 5.5 (measured at mash temperature). If it is too high you may want to add some 88% lactic acid to get it down into this range. If the mash pH was ok then the wort pH is most likely fine too unless the water you use is very hard. A pH in the lower end of this range helps produce a good protein break during the boil (more on this below) which in turn helps with beer clarity and long term stability. A lower pH also minimizes colour formation (important if we want to maintain a lighter coloured beer) and helps ensure a less harsh hop bitterness (even though hop utilization is actually increased at higher pH).
Measure the pre-boil gravity to see if we met our target. It should be:
Gravity units (GU) = (Target Original Gravity - 1) * 1000 * Post-Boil volume at 68F = (1.048 - 1) * 1000 * 12 = 576
Pre-boil gravity = ((GU / Pre-Boil volume) / 1000) + 1 = ((576 / 14.9) / 1000) + 1 = 1.039
Remember that gravity changes with temperature and not all tools (such as floating hydrometers) compensate for temperature. For more information see our Measuring Gravity guide.
 Measuring wort pH and gravity in the Boil Kettle before boiling to see if we hit our targets
After boiling water off for 90 minutes the wort concentration will increase and be closer to our 1.048 target gravity.
If the A-M light on the Boil PID is not on, press the A/M button to enter manual mode. You should see the lower green SV number display as "M XXX" where XXX is a number. If the "M" is not displayed press the SET button to switch the display mode. Press the UP/DOWN buttons on the Boil PID until the lower green number reads "M 100". We will be firing the Boil Kettle element 100% of the time until the wort is at boiling. Remember that the Boil Kettle PID is run in manual mode instead of automatic. For more information see STEP 9: Wire up PID controllers of our control panel build instructions.
Turn the ELEMENT SELECT switch to BOIL. The Boil Kettle element now fires continuously to heat up the wort. It takes approximately 30-45 minutes to heat 14.9 gallons of wort from the sparge temperature of around 140-150F to boiling. It's best to keep the lid off during this period so that you can watch for boil-overs as the temperature increases. If brewing indoors, run your hood fan at high speed to exhaust any excess heat and moisture.
OPTIONAL ALARM: You may set the Boil Kettle alarm to sound once a temperature just below boiling is reached (such as 208F) to warn you that the wort is about to boil and that the possibility of boilover may occur. Press and hold the SET button on the Boil Kettle PID until ALM1 is displayed. Press the UP/DOWN buttons until 208 is displayed. To exit the setup menu, wait 10 seconds. Turn the Boil Kettle ALARM switch ON. When the wort temperature reaches 208F the alarm will sound, warning you of the possible boilover. Turn the Boil Kettle ALARM switch OFF to turn off the alarm. Easily distracted brewers may prefer to also run the Boil Kettle PID in automatic mode set to 208F instead so that the boiling is never actually reached. Once the alarm sounds, switch over to manual mode at 100% and watch carefully, stirring as needed.
As the wort heats up, a thick foam appears with a darker crust (which some brewers call 'foop'). Scoop it off and discard using a skimmer if desired. This thick foam is made up of coagulated proteins. Some believe it can cause off-flavours (mostly in lighter beers such as our Blonde Ale).
 Foam starts to appear a few minutes after turning on the Boil Kettle element
 As we approach boiling, the foam gets thicker and darker (called 'foop') that we scoop and discard using a skimmer. 'Scooping our foop' also helps reduce the chance of boilovers.
As boiling approaches a thin foam will rise. This is the 'protein break' or 'hot break'. Watch and stir with the skimmer as required to reduce the amount of foam and avoid a messy boilover. Dipping the skimmer in cold water periodically helps. Eventually the foam will subside and fall back into the wort. Once boiling, press the DOWN button on the Boil PID to reduce the heating element duty cycle but still maintain a good vigorous boil. We find that 75-85% works well but this will depend on the boil volume, ambient conditions, and heating element power.
 Foam continues to build as we near boiling point. Watch and stir as required to avoid boilovers.
 Eventually the foam starts to fall back into the wort and we are left with a vigorous boil
If using boil salts, add them at this time.
We will be boiling the wort for 90 minutes instead of 60 minutes which is typical for most beers. We are boiling 50% longer as Pilsner malt is more apt to produce dimethyl sulfides (DMS) and a longer boil time helps drive off more DMS causing compounds (excess DMS may result in a 'cooked corn' taste and aroma in the beer). The wort pH will also drop slightly during the boil which will help with long term stability. Some beers where caramelization is wanted (such as barleywines) can benefit from an even longer 120 to 180 minute boil. For more information on boil times see page 61 of Brewing Better Beer.
The time starts after the foam has subsided. We want to count down our 90 minute boil:
- If your control panel uses the newer JSL-74A timer: Press the STP button, followed by the SET button, then use the UP/DOWN buttons until the lower number reads "90:00". Press the SET button to exit (or wait).
- If your control panel uses the original Eagle B506-5001/Omega PTC-21 timer: Press the 4/3/2/1 buttons until the lower number reads "90:00".
Press the RESET button to start the timer. The top number on the timer will count down from 90:00 to zero.
OPTIONAL ALARM: To be notified when the 90 minute boil is finished, turn the timer ALARM switch ON. Once the alarm sounds turn the timer alarm switch OFF or press the RESET button.
Leave the Boil Kettle lid off during the entire boil. The DMS causing sulfur compounds in the wort must be boiled off.
 We organize our boil additions into containers beforehand. Less chance of forgetting something!
 While boiling we usually take the time to empty and clean out the Mash / Lauter Tun. The spent grain is recycled.

Hops are added during the boil to offset the sweetness of the malt. Our recipe calls for one hop addition of German Hallertau Mittelfruh at the 60 minute mark, which is 30 minutes into our boil. When the timer reads "60:00", add the hops. These hops will be boiled for a total of 60 minutes. This is our only hop addition for this recipe. Different recipes may call for hop additions at various times. Generally speaking, hops added at the start of the boil add bitterness, hops added in the middle of the boil add flavour, and hops added near the end add aroma. Some recipes will even have you add hops to the mash (called 'mash hopping'), to the Boil Kettle while sparging (called 'first wort hopping'), or post-boil at lower temperatures. All are done to create complex hop flavours and aromas. See our recipes for examples, or chapter 5 of How to Brew and chapter 2 of Brewing Better Beer for more information.
When the timer reads "15:00", add the Whirlfloc tablet (clarifier) to help with wort clarification.
Some brewers like to add yeast nutrients near the end of the boil. We normally do not use yeast nutrients as malt based wort is already an excellent source of the carbohydrates, amino acids, vitamins and minerals that yeast requires for successful fermentation. There is no harm however in supplementing if you have concerns with the health or performance of your yeast, especially if fermenting a very high gravity wort, a wort with a high amount of adjuncts or refined sugars (like table sugar), or when reusing yeast that has already been pitched multiple times. Refer to the instructions for your specific yeast nutrients for usage rates if you wish to use them in your beer.
When the timer reads "00:00", turn the ELEMENT SELECT switch to OFF. The boil is complete!
 After the boil is complete, the wort looks like egg drop soup. A good vigorous boil and Whirlfloc helps coagulate proteins.
 Coagulated proteins and whole hops at the bottom of the Boil Kettle. The wort itself should be clear which is the sign of a good vigorous boil and proper use of clarifying agents.
The video below shows boiling in action:
STEP 9: Chill
After the boil is complete it is important to chill the wort as quickly as possible. This helps reduce possible oxidation, prevents DMS from forming, and prevents contamination from bacteria and wild yeast. We use an efficient counterflow chiller (CFC) to chill in one pass. Small portions of the wort are chilled nearly instantaneously instead of chilling the entire batch slowly. If the entire batch is cooled too slowly (such as with an immersion chiller) cold break may not come out of solution which can result in a hazy beer (called 'chill haze') once it is refrigerated for serving.
Start chilling immediately after the boil is completed. We use a Hop Stopper filter in the boil kettle to ensure that hops and trub are not transferred to the fermenter. There is no need (or benefit) to whirlpooling and waiting before chilling when using a Hop Stopper. For more information see the case against whirlpooling guide.
While not a factor in this Blonde Ale recipe, not having to wait before chilling helps maximize the late addition bright hop flavours and aromas found in many beers such as IPAs. Steeping hops at near boiling temperatures after the boil continues to turn these flavours and aromas into bitterness which is something we usually do not want with IPAs or other hop forward beers. Because of this, we chill hop forward beers as quickly as possible, do not whirlpool, and do not steep at near boiling temperatures. Chill speed is less of a concern with beers that only include a single 60 minute bittering addition (such as this recipe) as all of the hop alpha acids will have already been isomerized iso-alpha acids creating bitterness.
Cold tap water is used to chill the wort. Our target temperature is 68F for this Blonde Ale. If your tap water is above the target wort temperature then the water can be first chilled by using a pre-chiller in a bucket with ice and water. Another option is to chill the wort as far as you can using tap water and then let your wine fridge / beverage center, regular fridge or freezer with temperature controller, or chilled conical fermenter bring the temperature down the rest of the way before pitching the yeast. Lagers require more chilling than ales due to the lower fermentation temperatures. Brewers without adequate chilling methods may resort to only brewing ales (most of which ferment well at near room temperatures) or only brewing lagers during the winter months when the ground water is colder and they have a cold spot to ferment in.
Close all valves. Connect hoses as shown in the picture below.
 STEP 9: Chill
 Our cold water source is tap water. The heated water is usually discarded. By all means save it for laundry or other uses if you can!
Turn on the cold water source all the way. OPEN the Boil Kettle valve. Turn the WORT PUMP switch ON. OPEN the Wort Pump valve slightly and monitor the wort temperature using the thermometer on the chiller. Adjust the Wort Pump valve to increase or decrease the wort flow rate which in turn affects the final wort temperature: The slower the wort flow rate, the more the wort will be chilled.

 Wort being chilled and racked (transferred) into a glass carboy
It should take approximately 15 minutes to chill the 12 gallons of wort. When the Boil Kettle is empty, turn the WORT PUMP switch OFF and close all valves.
Measure the pH of the chilled wort using the pH meter if desired. It should be around 5.0 to 5.5 (measured at room temperature) with lower being better as it helps with long term stability. Do not make any pH adjustments. We measure simply to keep records for possible future troubleshooting.
Measure the post-boil gravity to see if you met your target original gravity. It should be 1.048, but if this was your first time using the system you will have guessed at your system's mash efficiency and it will likely be off. That's ok - there will still be delicious beer! Enter your measured gravity reading into your brewing software to have it calculate your system's actual mash efficiency. Your software will then automatically adjust the grain amounts for next time to achieve closer to 1.048.
 Measuring post-boil gravity using a hydrometer
The video below shows wort chilling in action:
STEP 10: Clean
When the brew day is done, everything is cleaned. A blue non-scratch scrub sponge with hot water and a bit of oxygen based cleaner is used to clean the Mash / Lauter Tun and Boil Kettle. To clean the Boil Kettle heating element a narrow bottle brush is passed in and around the heating element rods. The Hot Liquor Tank does not need cleaning as it only ever has water in it. To wash out the hoses, pumps, and chiller we run hot water infused with cleaner through them. Nothing needs to be disassembled as this is the hot side of the brewing process where everything will be boiled anyway. OxiClean is a great (readily available) oxygen based cleaner for stainless steel and the other materials used in our brewery, similar to powdered brewery wash (PBW) but slightly less potent. The liquid spray form is very convenient for quick cleaning.
When we want to do a thorough cleaning of this hot side brewing equipment (usually about once a year), we heat up and dissolve a scoop or two of oxygen based cleaner in the Boil Kettle and recirculate through all the hoses, pumps, and chiller for an hour or two at 170F to get off any build-up. No scrubbing required and again, nothing needs to be disassembled first. Everything is then rinsed with water. The long soak always returns everything to looking shiny and new (see video and pictures below).
Passivation isn't required after a cleaning, assuming you're not cleaning with a steel brush or scrubby (which you shouldn't do). Once the metal is clean, the oxygen in the atmosphere will reform the protective chromium oxides instantly. The steel will be nearly as passivated as if it was dipped in acid. Nitric acid passivation creates a more chromium-rich passive surface, but is not necessary for brewing use.
A compact shop vac is used to blow out standing water from the various parts after cleaning.
If brewing indoors with a hood fan, we recommend that you continue running the fan at low speed for a few hours after the brew day is done to help dry out the fan and ducts completely.
STEP 11: Ferment and package
Once cooled, the wort is fermented with yeast to turn it into beer. How you ferment and package your beer is in no way related to how you created the wort using our Electric Brewery setup, so you may proceed as you would normally. There is nothing about our setup that could or should cause you to alter your fermentation or packaging steps in any way. A future guide (currently in the works) will include further details on exactly how we ferment and package.
For those of you new to brewing, refer to our Fermenters guide for more information on the different types of fermenting equipment available and our recommendations.
Cheers!


Pictures / Videos
One of our customers put together this excellent video montage of his brew day:
The pictures and videos below are from various brew days over the years brewing different beers. Hundreds more available in our recipes. Interested in seeing what we're brewing right now? Follow us on Instagram for pictures and videos of our brewing activities as they happen.
For hundreds more brew day pictures and videos see our recipes.
