Storing Hops and Dry Yeast
- Introduction
- Parts and tools
- STEP 1: Make a seal across the bottom of the roll
- STEP 2: Cut the roll
- STEP 3: Make vertical seals
- STEP 4: Fill pouches
- STEP 5: Seal pouches
- Pictures / Videos

Introduction
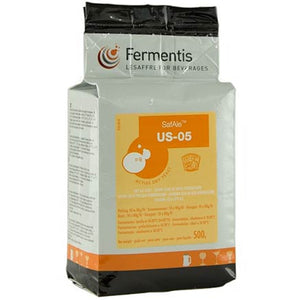
To save money we usually purchase hops by the pound and some dry yeast in 500g bricks (such as Safale US-05 and Saflager W-34/70). We then re-package them using a Foodsaver vacuum food sealer into smaller pouches made out of Foodsaver rolls in order to keep them fresh.
While it's best to use hops as fresh as possible, keeping them in a freezer in sealed Foodsaver pouches (away from oxygen) helps to greatly extend freshness. We find that even the most delicate aroma / flavour hops will keep well for years using this method. We recommend using a non frost-free freezer to avoid any hot / cold cycling.
Dry yeast stored cold will extend the yeast viability, often well beyond the best before date. We've had excellent results using dry yeast a year or two beyond the printed best before date as long as it was stored cold. For best storage temperature and conditions refer to the yeast manufacturer, though most active dry yeast viability will remain highest if stored just above freezing. In discussions with some dry yeast manufacturers, it was pointed out that viability may be reduced slightly (usually a few percentage points) through repackaging. We find this is offset by the large cost savings from buying in bulk.
Parts and tools
Purchasing through our affiliate links helps support our site at no extra cost to you. We thank you!
STEP 1: Make a seal across the bottom of the roll

Make a seal across the bottom of the Foodsaver roll as you would normally.
Step 2: Cut the roll

Cut the roll at the desired length to create a single pouch using a pair of scissors (or the Foodsaver integrated blade found on some models). Make sure the length is not longer than the width.
Step 3: Make vertical seals

Turn the pouch sideways and use the Foodsaver to create anywhere from 1-3 seals across the height of the pouch to create smaller pouches. We find it easier to first fold the pouch to create creases to follow. This helps ensure the pouches are evenly sized.
Step 4: Fill pouches

Weight out hops and dry yeast using a jewelry scale and fill the pouches. Make sure whatever container you use to weigh the dry yeast has first been properly sanitized.
Since lagers tend to require twice as much yeast as ales, we tend to fill the pouches with 12 grams of Safale US-05 and 24 gams of Saflager W-34/70 (for example).
The hop amounts will vary as well, usually anywhere from 0.5 to 4 ounces depending on the style of hop and how it's used. For example, a hop such as Hallertau or Magnum that are often only used for 60 minutes bittering additions may get split into 1 ounce pouches. A fruity new world hop such as Citra or Galaxy on the other hand, may get split into 4 ounce pouches as they're used in much larger amounts.
Your batch size will also come into play here.
Step 5: Seal pouches


Place the open end of the pouch in the Foodsaver and seal as you would normally. Mark the pouches with a Sharpie permanent marker and store hops in a non frost-free freezer at 0° F (-18° C). For yeast storage temperature follow the manufacturer recommendations. Most active dry yeast viability will remain highest if stored just above freezing.
We keep ours organized in Ziploc double zipper gallon storage bags.
Pictures / Videos
Interested in seeing what we're brewing right now? Follow us on Instagram for pictures and videos of our brewing activities as they happen.


