Electric Hop Candy Jr. (New England Pale Ale)

Testimonials
"This hands down is the best pale ale I have made yet! I can't get over the amount of juicy hop flavor and aroma. Love the hops with restrained bitterness! Everyone who has tried it can't get over just how good this is. This is a great style and I would definitely brew this over and over in my rotation. Thanks for sharing this wonderful recipe for an outstanding NEPA!" - jcav (John)
"This is an amazing recipe! Brewed a couple weeks ago and it tastes great." - AwakenedBrewer
"Another winning recipe from your website ... it turned out great, solid pungent aromatics and a delicious lower ABV NEIPA style beer. The low bitterness restricts the bite and you get a nice soft mouthfeel with loaded hops flavours as we now describe as Juicy." - Dan Pratt
"I must give massive credit to Kal. I finally put this into kegs and served it this 4th of July. It's possibly the best beer I've made to date and everyone that was fortunate enough to try it agreed." - alphakry
"This recipe is an absolute favourite to have on tap and a hit with guests. It goes superbly with a smash burger or rack of ribs." - @fireandthyme
Introduction
This is a lower alcohol 'sessionable' Pale Ale version of our Electric Hop Candy New England IPA (NEIPA). At 5.0% ABV (instead of 6.5%), it's perfect for those days when you're looking for all the flavour but don't necessarily want to feel the effects after having a few pints.
New England IPA is a new style of beer that uses many new techniques and ingredients in special combinations to produce a surprisingly juicy beer, brimming with tropical fruit hop flavours and aromas, complimented by a smooth mouthfeel and a hazy appearance. The style showcases the softer side of hops by embracing their juiciest characteristics while downplaying bitterness. It is an incredibly drinkable beer, and over the last couple of years it's been taking the craft brewing world by storm. For more information on the New England style of beers, refer to our Electric Hop Candy recipe where we break down the style in detail.
Lower alcohol beers can become harsh when over-hopped, so the hop additions have been reduced in this version: Approximately 3/4 the kettle hops and 1/2 the dry hops.
To give this version a bit of a twist as compared to our regular Electric Hop Candy, we swapped out a portion of the Citra kettle hops for Amarillo which provide a nice hint of apricot. Works great with this style.
To avoid drying out the beer too much, the single infusion mash temperature was raised from 152F to 160F and we use a healthy dose of Carapils or Carafoam (1.4-2.9L) to replace some of the Domestic 2-row (1.8-2L) and Maris Otter (2.5-4L) base malts. This malt helps raise the final gravity as this malt produces mostly unfermentable sugars. The higher mash temperature also helps ensure we end up at the target gravity we want (1.014). Too low a final gravity and the beer may taste overly thin, a common problem with lower alcohol version of beers where nothing but the amount of malt is modified. When making lower ABV versions of your favourite beers you want to re-assess the percentages used in the grist and possibly swap out some base malt for unfermentables.
We also tried Yeast Bay Vermont Ale during an experimental version of this beer as we had an old vial we wanted to use (see videos below). As expected, it attenuated a bit too far (1.010), but was still great (not too dry). we recommend sticking with Wyeast 1318 London Ale III, same as with our regular Electric Hop Candy.

Electric Hop Candy Jr. (New England Pale Ale)
Size: 12 US gallons (post-boil @ 68F)
Mash Efficiency: 95%
Attenuation: 73%
Calories: 174 kcal per 12 fl oz
Original Gravity: 1.052 (style range: 1.045 - 1.060)
Final Gravity: 1.014 (style range: 1.010 - 1.015)
Colour: 5.6 SRM (style range: 5 - 10)
Alcohol: 5.0% ABV (style range: 4.5% - 6.2%)
Bitterness: 24? IBU (style range: 30 - 50) (Ignore*)
Mash:
4.8 lb Domestic 2-row malt (1.8-2L) (24.9%)
4.8 lb Maris Otter malt (2.5-4L) (24.9%)
2.9 lb Pale (or white) wheat malt (1.5-2.4L) (15.0%)
2.9 lb Flaked oats (1-1.5L) (15.0%)
2.9 lb Carapils or Carafoam (1.4-2.9L) (15.0%)
1 lb Honey malt (25L) (5.2%)
Boil:
2 oz Amarillo hops (8.0%) - added first wort*, boiled 60 min [14.0 IBU]
1 Whirlfloc tablet (Irish moss) - added during boil, boiled 15 min
4 oz Amarillo hops (8.0%) - added during boil, boiled 5 min [10.0 IBU]
Post-boil:
2 oz Citra hops (14.1%) - added after boil, steeped at 180F for 30 min
2 oz Mosaic hops (12.2%) - added after boil, steeped at 180F for 30 min
Yeast:
Wyeast 1318 London Ale III yeast
(~438 billion cells [4-5 fresh packs] or an equivalent starter)
Dry hop:
2 oz Citra hops (14.1%) - dry hop #1 (added to fermenter at high krausen, 1 day after pitching yeast)
2 oz Mosaic hops (12.2%) - dry hop #1 (added to fermenter at high krausen, 1 day after pitching yeast)
2 oz Citra hops (14.1%) - dry hop #2 (added to brite tank, steeped 3 days)
2 oz Mosaic hops (12.2%) - dry hop #2 (added to brite tank, steeped 3 days)
*First wort hops are added to the boil kettle at the start of sparging (before the wort is boiled). For IBU calculations, first wort hopping is said to be similar to a 20 minute addition, but we wouldn't worry about trying to figure out the IBU in this recipe. Ignore IBU calculators on beers like this where most of the hops are added late in the boil as the numbers will vary greatly depending on who's calculator you want to believe/use. In our brewing software, depending on which curve we use the beer's IBU will vary from 9 to 32. Useless! What matters is how the beer tastes.
Purchasing through our affiliate links helps support our site at no extra cost to you. We thank you!
Notes / Process
- Add 500mg potassium metabisulfite to 20 gallons water to remove chlorine / chloramine (if required).
- Water treated with brewing salts to our Hoppy New England flavour profile: Ca=100, Mg=18, Na=16, Cl=200, SO4=100 (Higher chloride and lower sulfate as compared to what is normally done with most American IPAs. This helps create the silky smooth and rich mouthfeel, pushing the hop flavours to be rounded and less sharp/dry). For more information on how to adjust your water, refer to our step by step Water Adjustment guide.
- The flaked oats (1-1.5L) do not need to be milled as they have already been rolled flat and toasted. Add them to the mash as is.
- 1.25 qt/lb mash thickness.
- Single infusion mash at 160F for 90 mins. While normal mash pH is typically 5.2-5.4 (when measured at mash temperature) you may want to aim on the higher end of this range to get a beer that is rounder/more full instead of sharp.
- Raise to 168F mashout temperature and hold for 10 mins.
- ~90 min fly sparge with ~5.6-5.8 pH water (measured at mash temperature). At start of sparge add First Wort Hops to the boil kettle to let them steep as the wort is collected.
- Boil for 60 minutes, adding Whirlfloc and hops per schedule at 15 and 5 minutes left.
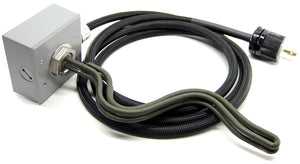
- Once boil is completed, quickly chill the wort to 180F (a copper immersion chiller works well - even the cheapest 25' x 3/8" immersion chiller will only take 2-3 minutes to chill from 212F to 180F). On our control panel, switch the BOIL PID to AUTO mode and set the temperature to 180F. This will hold the wort at 180F. Do not worry if you undershot the 180F target temperature slightly when chilling with the immersion chiller. Our control panel will quickly raise the temperature back to 180F and hold.
- Add the steeping hops, put on the kettle lid, and wait 30 minutes. There is no need to stir the wort during this time. The control panel will fire the heating element periodically to maintain the 180F temperature which also gently stirs the wort through convection currents to ensure an accurate temperature. Hop extraction is more a function of contact time rather than wort movement.
- After the 30 minute steep turn off the heating element and chill the wort quickly to 66F (we use a one-pass convoluted counterflow chiller to quickly lock in hop flavour and aroma) and transfer to fermenter.
- Aerate or oxygenate the chilled wort to a level of 8-10 ppm dissolved oxygen. For more information refer to our Aerating / Oxygenating Wort guide.
- Pitch yeast and ferment at 68F (wort temperature). We use modified stainless fermenting buckets in wine fridges.
- Assuming you did not underpitch the yeast, after 24 hours you should be at high krausen (highest point of foaming). Add dry hops #1 directly to the fermenter.
- Continue to ferment at 68F (wort temperature) until approximately 5 points from final gravity and then raise the temperature to 70-72F until finished. In our case we simply turn off the fermenting fridges and allow the beer to naturally rise to room temperature. Assume fermentation is done if the gravity does not change over ~3 days.
- Add dry hops #2 to brite tank (we use 5 gallon glass carboys), purge with CO2 to avoid oxygen pickup, then carefully rack in the beer on top of the hops. Allow to steep for 3 days at 70-72F room temperature. We do not recommend using hop sacks or other containers as you'll get the best flavour extraction from the hops if you let them roam free. You may also consider adding dry hops #2 directly to the fermentation vessel and skipping the use of the brite tank. In most cases we recommend skipping the use of a brite as the less you handle the beer and potentially expose it to oxygen, the better.
- After 3 days of contact with dry hops #2, package as you would normally. We rack to kegs that have first been purged with CO2, and then carbonate on the low side (around 2 volumes of CO2) to minimize carbonic bite and let the fruity hop and subtle malt flavours shine through. We chill the kegs to near freezing while carbonating at the same time in a 6-keg conditioning fridge. After ~1-2 weeks at serving pressure the kegs will be carbonated and ready to serve. Like most hop forward beers this New England Pale Ale is best consumed fresh so feel free to raise the CO2 pressure temporarily to 30-40 PSI to carbonate fast over a 24 period, and then turn back down to serving pressure. Some hop bits will have invariably made their way into the keg so we use a Hop Stopper Keg Edition filter to ensure that hops do not clog the dip tube and/or end up in the glass. Force carbonating at high pressure and using the Hop Stopper filter allows us to serve this beer 24 hours after kegging. There's no need to wait a few days for any hop bits that made their way into the keg to first settle out.
- We do not recommend using finings such as unflavoured gelatin as it may "round off" hop flavours / aromas.
For detailed brewing instructions, see our Brew Day Step by Step guide.
Try your hand at this softer, rounder, juicier Pale - brew Electric Hop Candy Jr today! Enjoy!
Questions? Visit our Electric Hop Candy Jr (New England Pale Ale) forum thread.

Pictures / Videos
Interested in seeing what we're brewing right now? Follow us on Instagram for pictures and videos of our brewing activities as they happen.
For more pictures and videos of Electric Hop Candy Jr search Instagram for #ElectricHopCandy.
