Timothy Taylor's Landlord
 Comparing our Timothy Taylor Landlord with the real thing. They’re darned close but everyone seems to prefer mine. Maybe they’re being nice! 😉
Introduction
Timothy Taylor's Landlord is an English pale ale (BJCP 2021 style 11B 'Best Bitter') that features complex biscuit and toffee aromatics blended with earthy / citrusy hop flavours using Golden Promise malt with Styrian Goldings and Fuggles hops.
Landlord was first brewed in 1953 as a Competition Ale where it was left up to the local drinkers to name it. A steward of the local Keighley Drill Hall Club won the right, chose 'Landlord', and received £500 for his efforts. The daughter of the chairman of the brewery at the time created the 'jovial landlord' you see still see on the branding today.
As mentioned in our Fuller's London Pride recipe, don't let the word 'bitter' throw you off in the 'best bitter' style name. English bitters are nowhere near as bitter as American styles. This beer, like London Pride, is all about balance. It's only bitter enough to balance the malt backbone.
On the surface the beer sounds no different than the hundreds, if not thousands of other beers brewed in the UK using classic British ingredients. Landlord however inspires a cult-like devotion among its fans and has won more awards than any other beer, winning both CAMRA Champion Beer of Britain and the Brewing Industry Awards Gold Medal four times. Many would argue that this is the British ale against with all others are measured. There's something truly special about the ingredients and process used. Timothy Taylor explains some of this in this video tour of their brewery:
After much research we find we've gotten very close to recreating much of the Timothy Taylor magic through our recommended ingredients and process listed below.
Commercially Landlord is available in two strengths: 4.1% ABV in the bottle and 4.3% cask, with both clocking in around 45 IBU. We've gone with the slightly higher 4.3% ABV version here at 40 IBU. Why the IBU difference? There are about a dozen different ways to measure IBU and they don't agree, so we went with a level that we feel best matches the commercial version through taste. That said, the 5 IBU difference isn't going to be easily noticeable.
Golden Promise malt is required to brew a true Landlord - it's an early-maturing spring barley, basically the Scottish equivalent of Maris Otter. If you have difficulties finding Golden Promise consider using Maris Otter instead, preferably from a UK maltster. While this substitution may not be 'true' to the original Landlord, it'll still produce a very enjoyable beer. Experimenting by changing up a single ingredient is a great way to learn how it affects the recipe.
A very small amount of dark kilned malt is used for strictly for colour. We like Weyermann Carafa III Special malt (525L) due to its smoothness, but feel free to use whatever else you have on hand or omit it completely as it does not (or should not) affect flavour.
Yeast substitutions should be avoided. Best to use Wyeast 1469 West Yorkshire Ale yeast as it's the true Timothy Taylor strain. Like your choice of malt, you can certainly use other English strains such as Wyeast 1968 London ESB Ale or Wyeast 1028 London Ale and still make a great beer but it will be different from Landlord. Again, experimentation is recommended!
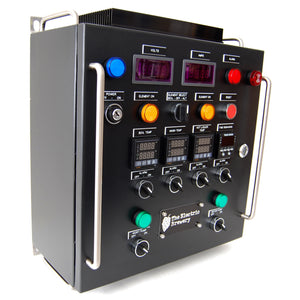
This beer requires a long hard rolling boil to achieve the caramelization and rich maltiness the beer is known for. We aim for a pre to post boil volume reduction of 23.5%. Not a problem using our Electric Brewery Control Panel where in our case we use a 5500W heating element and boil for 120 minutes on high power (85%) to reduce our initial 15.7 gallons down to 12 (when measured at 68F). A similar hard rolling boil is usually not possible with other electric setups we see in use today as many plug into a standard wall outlet that are limited to only 1800W in North America. If you're using a power limited electric setup we suggest reducing your batch size to achieve a proper hard rolling boil and the recommended reduction.
We recommend serving with a low carbonation level to mimic some of that cask goodness. CO2 has a carbonic bite or 'sourness' to it that we find destroys some of the subtleties of this beer so low carbonation is best.
Pay close attention to the other recommendations in our Notes / Process section below including water adjustments as replicating a beer is more than just the typical list of ingredients you see posted in most books or online recipes. Process is just as important and can completely change the outcome.
Brew up a batch and let us know how you like this world famous English pale ale!

Timothy Taylor's Landlord
Size: 12 US gallons (post-boil @ 68F)
Mash Efficiency: 95%
Attenuation: 75%
Calories: 147 kcal per 12 fl oz
Original Gravity: 1.044 (style range: 1.040 - 1.048)
Final Gravity: 1.011 (style range: 1.008 - 1.012)
Colour: 10.6 SRM (style range: 8 - 16)
Alcohol: 4.3% ABV (style range: 3.8% - 4.6%)
Bitterness: 40 IBU (style range: 25 - 40)
Mash:
15.5 lb Golden Promise malt (2.1-3.0L) (99%)
2.5 oz Weyermann Carafa III Special malt (525L) (1%)
Boil:
5 oz UK East Kent Goldings hops (4.1%) - added during boil, boiled 60 min [32 IBU]
1 Whirlfloc tablet (Irish moss) - added during boil, boiled 15 min
2.5 oz UK Fuggle hops (5.3%) - added during boil, boiled 10 min [8.3 IBU]
Post-boil:
2.5 oz Styrian Goldings hops (3.9%) - added immediately after boil, steeped for 30 mins
Yeast:
Wyeast 1469 West Yorkshire Ale yeast
(~373 billion cells or an equivalent starter)
Purchasing through our affiliate links helps support our site at no extra cost to you. We thank you!
Notes / Process
- Add 500mg potassium metabisulfite to 20 gallons water to remove chlorine / chloramine (if required).
- Water treated with brewing salts to our Hoppy lite flavour profile: Ca=110, Mg=18, Na=16, Cl=50, SO4=100 (Basically Randy Mosher's ideal Pale Ale numbers with slightly less sulfate and a Cl:S04 ratio of 1:2. We're not making a hoppy American beer here so we go a bit easy on accentuating bitterness.). For more information on how to adjust your water, refer to our step by step Water Adjustment guide.
- 1.25 qt/lb mash thickness.
- Single infusion mash at 154F for 90 mins.
- Raise to 168F mashout temperature and hold for 10 mins.
- ~90 min fly sparge with ~5.6-5.8 pH water (measured at mash temperature).
- Boil hard for 120 minutes to reduce volume by approximately 23.5% (in this case reducing our initial 15.7 gallon pre-boil volume to 12 gallons post-boil when measured at 68F). To achieve this we run our Electric Brewery Control Panel at 85% power output and use a 5500W heating element. A similar hard rolling boil is usually not possible with other electric setups we see in use today as many plug into a standard wall outlet that are limited to only 1800W in North America. If you're using a power limited electric setup we suggest reducing your batch size to achieve a proper hard rolling boil and the recommended reduction.
- Add Whirlfloc and hops per schedule.
- Once the boil is completed add the post-boil steeping hops, put on the kettle lid, and wait 30 minutes. There is no need to stir the wort during this time. Hop extraction is more a function of contact time rather than wort movement.
- Cool the wort quickly to 66F (we use a one-pass convoluted counterflow chiller to quickly lock in hop flavour and aroma) and transfer to fermenter.
- Aerate or oxygenate the chilled wort to a level of 8-10 ppm dissolved oxygen. For more information refer to our Aerating / Oxygenating Wort guide.
- Pitch yeast and ferment at 66-68F (wort temperature). We use modified stainless fermenting buckets in wine fridges.
- Ferment until approximately 5 points from final gravity and then raise the temperature to 70-72F until finished. In our case we simply turn off the fermenting fridges and allow the beer to naturally rise to room temperature. Assume fermentation is done if the gravity does not change over ~3 days.
- Before packaging you may optionally rack to a brite tank (we use 5 gallon glass carboys) that has been purged with CO2 to avoid oxygen pickup, add 1 tsp of unflavoured gelatin dissolved in a cup of hot distilled water per 5 gallons of beer, and allow to clear for 2-3 days. In most cases we recommend skipping this step as the less you handle the beer and potentially expose it to oxygen, the better.
- Package as you would normally. We rack to kegs that have first been purged with CO2 and then chill to near freezing while carbonating at the same time in a 6-keg conditioning fridge. After ~1-2 weeks at serving pressure the kegs will be carbonated and ready to serve. In a hurry? Feel free to raise the CO2 pressure temporarily to 30-40 PSI to carbonate fast over a 24 hour period, and then turn back down to serving pressure.
- Carbonate this beer to fairly low levels (the lower the better in our humble opinion, or even better, as a cask ale). If you have the means to serve it through a beer engine with no extra carbonation other than residuals left over from fermentation, do it! We think you'll really enjoy the difference. Over carbonation destroys a lot of the subtleties of this beer. Do not over carbonate. Another option that we've used is to serve the beer on a stout faucet pushed by a nitrogen/CO2 blend, producing a nice creamy head and close to flat beer. One inexpensive way to mimic this is to use a syringe (without needle). Pour the beer as you would normally and then suck up a syringe full and force it back into the beer, hard. Repeat 2-3 times and you'll knock most of the CO2 out of solution leaving a nearly flat beer with a creamy head. Not quite the same texture, but similar to a nitro pour. We tried this for years before finally adding a real nitrogen/CO2 serving setup to our basement bar.
For detailed brewing instructions, see our Brew Day Step by Step guide.
Enjoy!

Pictures / Videos
Interested in seeing what we're brewing right now? Follow us on Instagram for pictures and videos of our brewing activities as they happen.
